Tutorial: hledger-web
hledger-web is hledger's web browser-based UI. It's probably the easiest way to get started with hledger. Eg on windows, you can download and unpack hledger.zip and double click on hledger-web.exe. Screenshots below!
Check your installation
Open a terminal or command prompt and check your hledger-web version. It should be reasonably up to date. This doc was last tested with:
$ hledger-web --version
hledger-web 1.17.1
If this fails, check Installing for install and setup tips.
Start hledger-web
Normally, you start hledger-web by running hledger-web in a
terminal, with no arguments. Browsing to the executable file and
double-clicking on it can also work.
Normally, this will start the web app, making it accessible only from your local machine.
For this tutorial, to follow the steps/screenshots below and avoid disturbing any existing data, we'll start hledger-web with a new temporary journal file:
$ mkdir tmp
$ echo > tmp/.hledger.journal
$ hledger-web -f tmp/.hledger.journal
It will print a startup message and keep running, logging any web requests received:
22/Mar/2020:17:34:19 -0700 [Info#yesod-core] Application launched @(yesod-core-1.6.17.2-1LbNd7zV6uz551mHDWJO3b:Yesod.Core.Dispatch src/Yesod/Core/Dispatch.hs:163:11)
Serving web UI and API on 127.0.0.1:5000 with base url http://127.0.0.1:5000
This server will exit after 2m with no browser windows open (or press ctrl-c)
Opening web browser...
127.0.0.1 - - [22/Mar/2020:17:34:21 -0700] "GET / HTTP/1.1" 303 0 "" "Mozilla/5.0 (Macintosh; Intel Mac OS X 10.15; rv:74.0) Gecko/20100101 Firefox/74.0"
127.0.0.1 - - [22/Mar/2020:17:34:21 -0700] "GET /journal HTTP/1.1" 200 - "" "Mozilla/5.0 (Macintosh; Intel Mac OS X 10.15; rv:74.0) Gecko/20100101 Firefox/74.0"
127.0.0.1 - - [22/Mar/2020:17:34:23 -0700] "GET /static/js/typeahead.bundle.min.js HTTP/1.1" 200 - "http://127.0.0.1:5000/journal" "Mozilla/5.0 (Macintosh; Intel Mac OS X 10.15; rv:74.0) Gecko/20100101 Firefox/74.0"
...
You can leave this terminal in the background, or minimised, but don't quit it (unless you want the web app to quit).
And, your web browser should open, showing the UI. If not, open it yourself and browse to the url shown, ie http://127.0.0.1:5000 (and let us know).
A quick tour
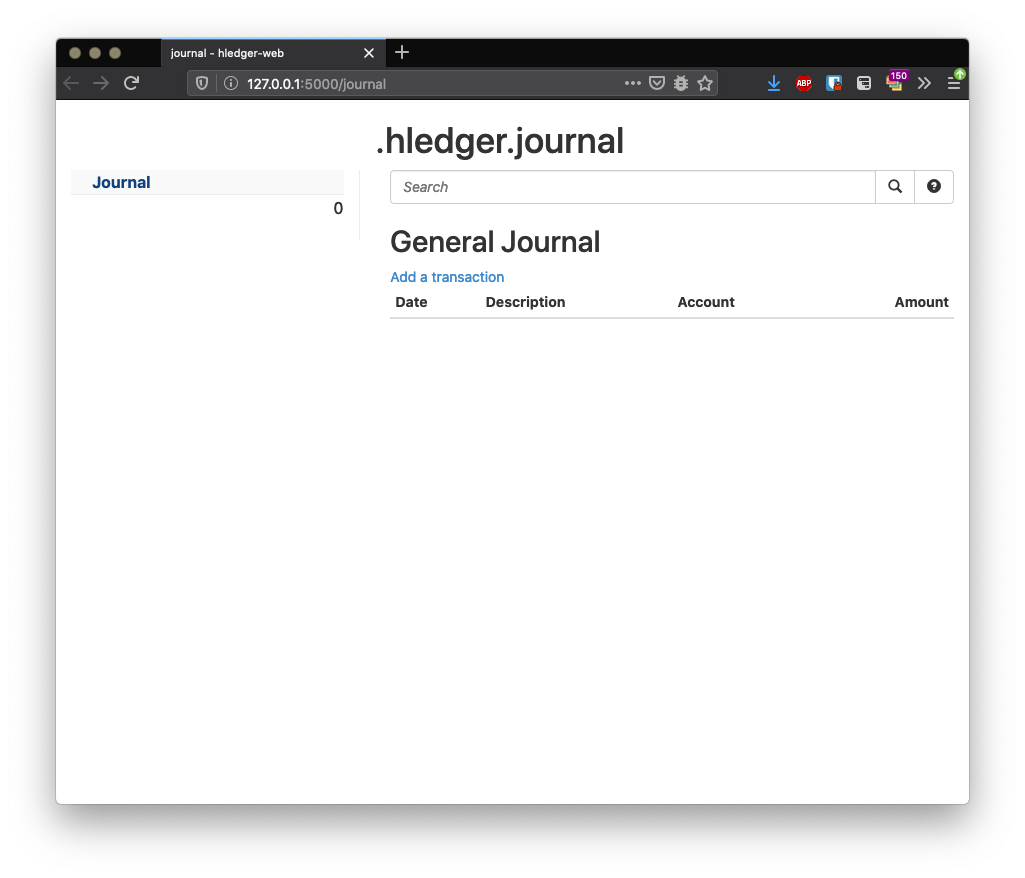
Here's the "home" screen, showing the empty default journal. Or if your journal already contained transactions, you'll see them listed. "General Journal" means the list of transactions, basically.
Let's hide the sidebar, for a simpler UI. Pressing the s key should do it
(if not, try again after clicking somewhere on the page, and let us know):
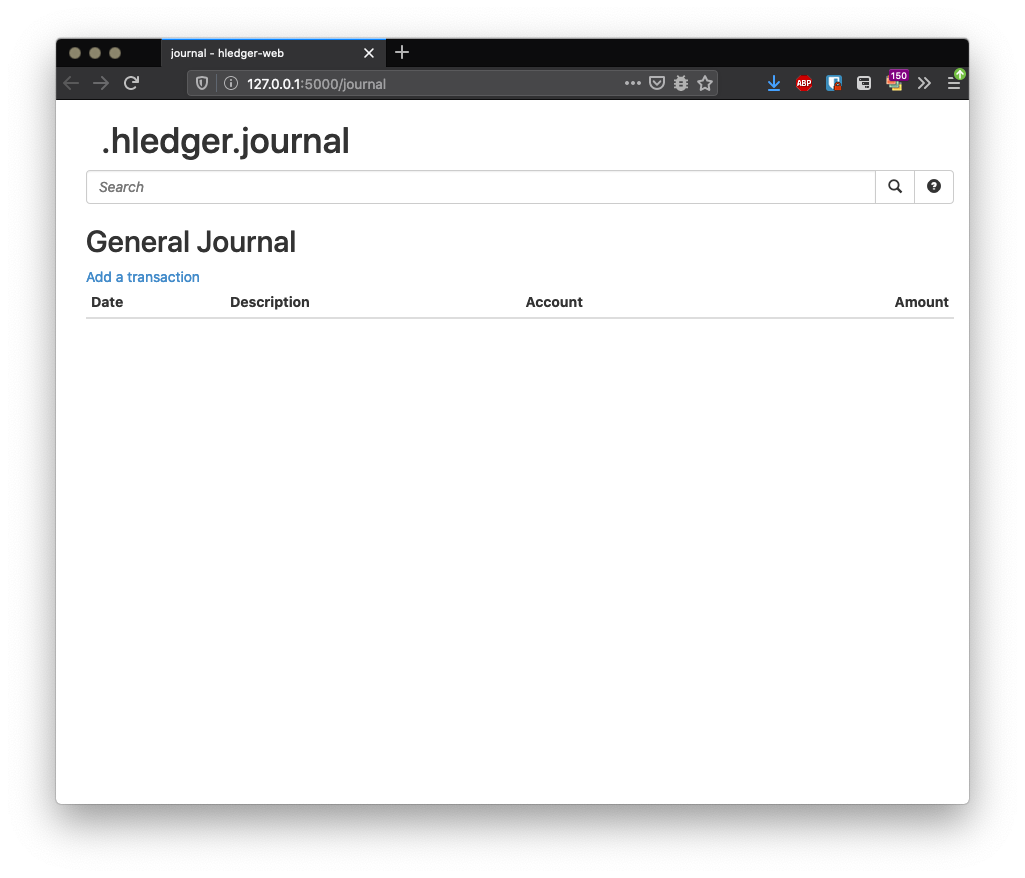
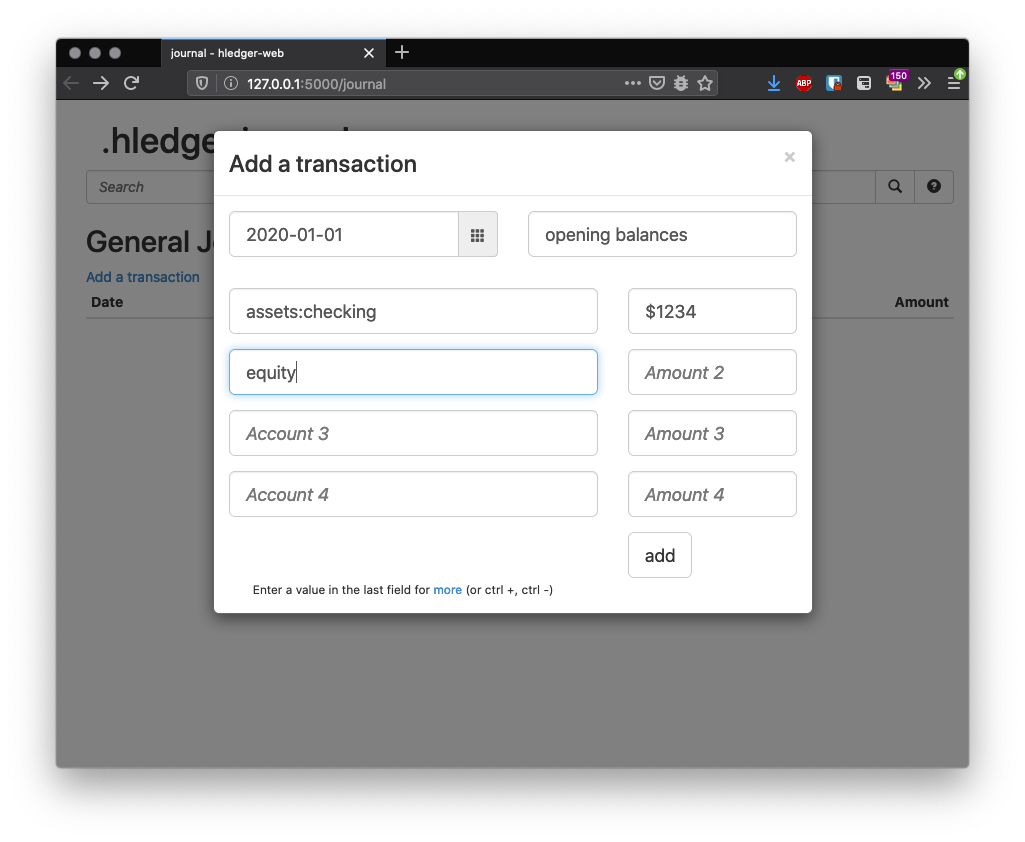
Let's record some transactions. Press the a key, or click "Add a transaction", to bring up the add form.
You may need to click or press TAB to focus the Date field:

We'll copy the sample transactions from the 5-minute quick start.
Press TAB to advance to each next field.
Amount2 can be left blank, or you can fill in $-1234 if you prefer:
Press RETURN or click the add button to save the transaction:
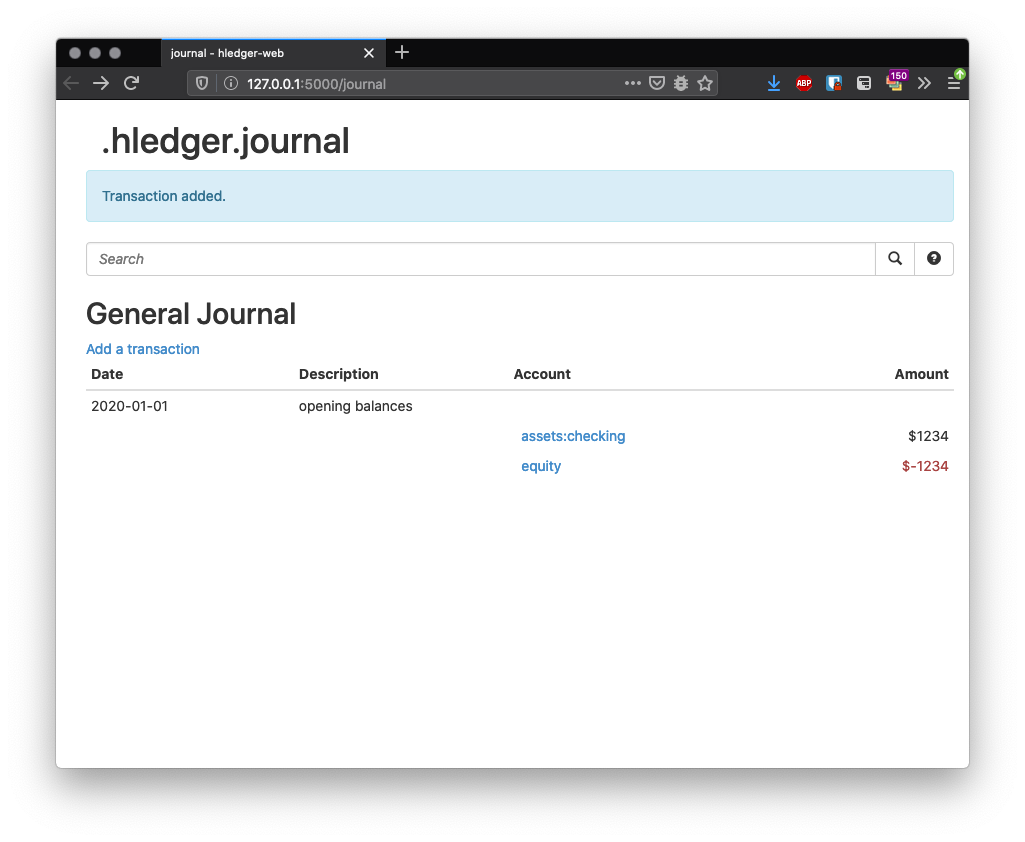
Press a again to add the next transaction.
As you type "assets:checking", you'll see there's some autocompletion available, since we have used that account before:
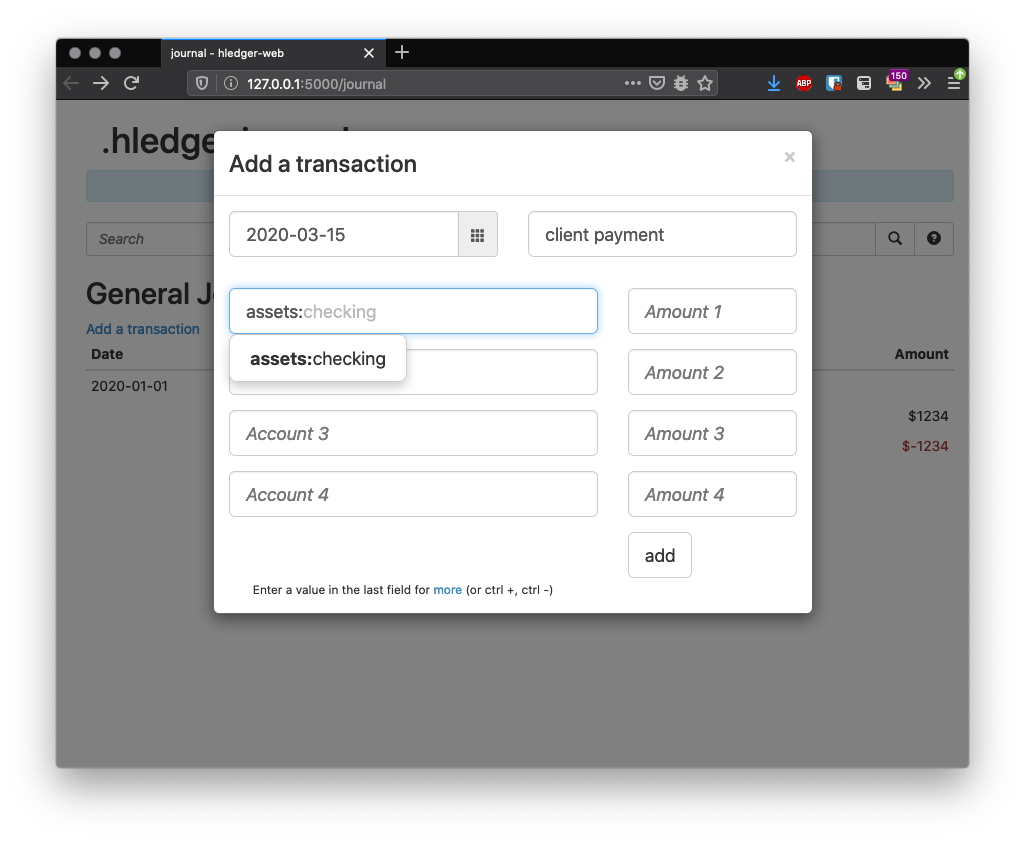
Finish the transaction, and press RETURN:
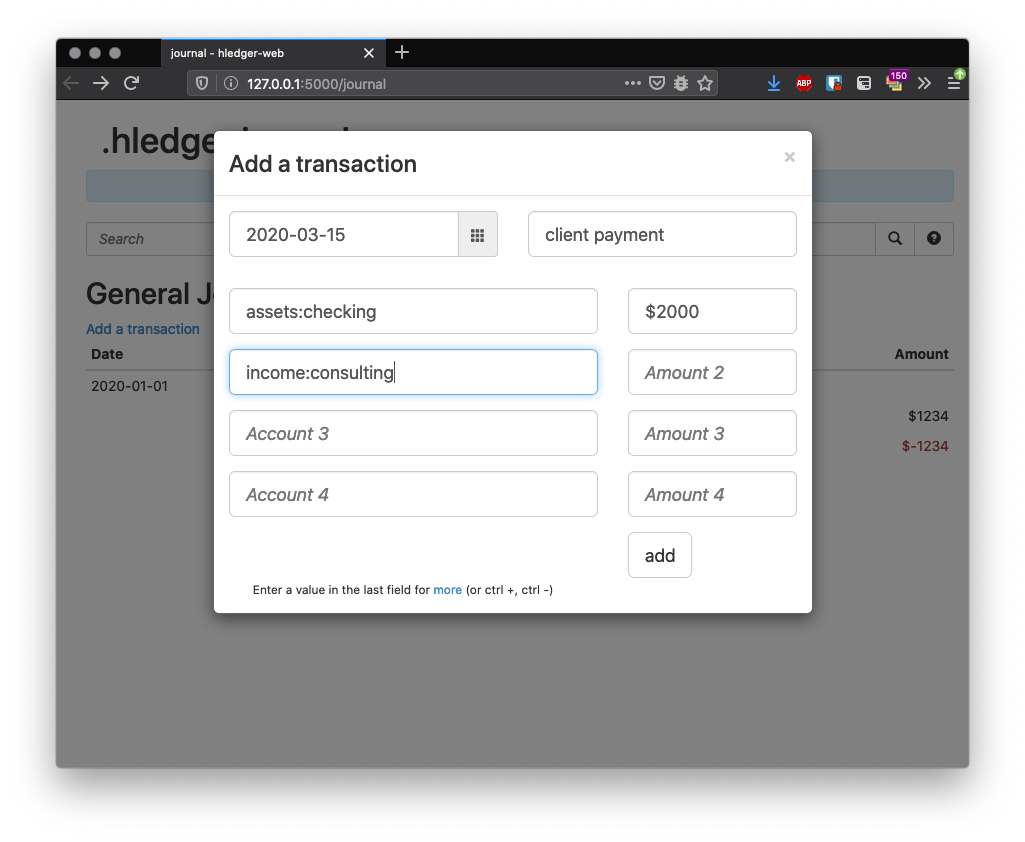
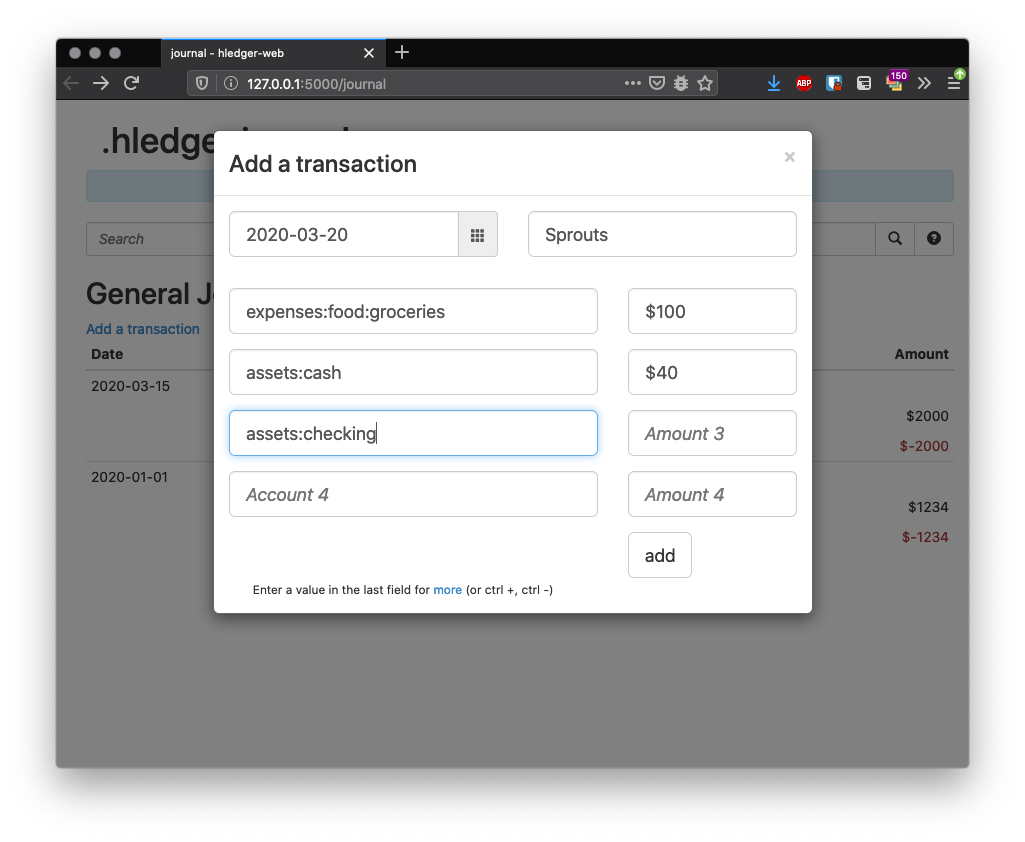
Press a and enter the final transaction.
This one has three postings (we spent $100 on groceries and also withdrew $40 as cash).
As before, you can optionally leave one of the amounts blank:
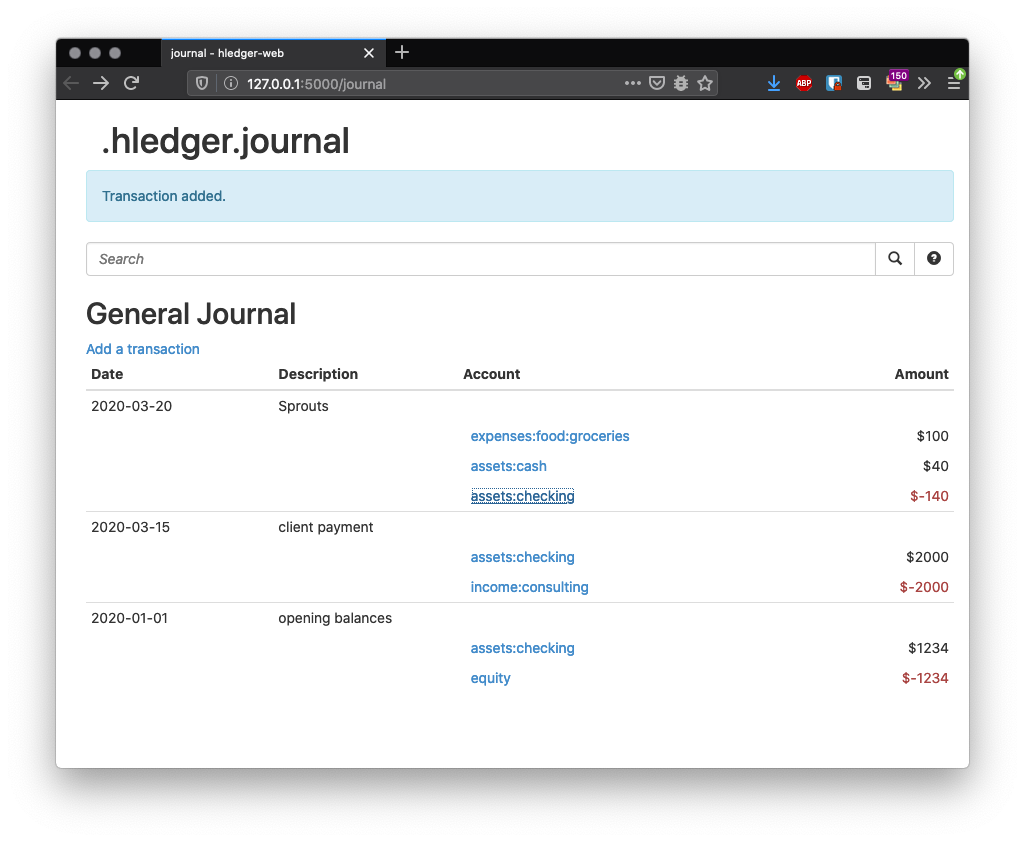
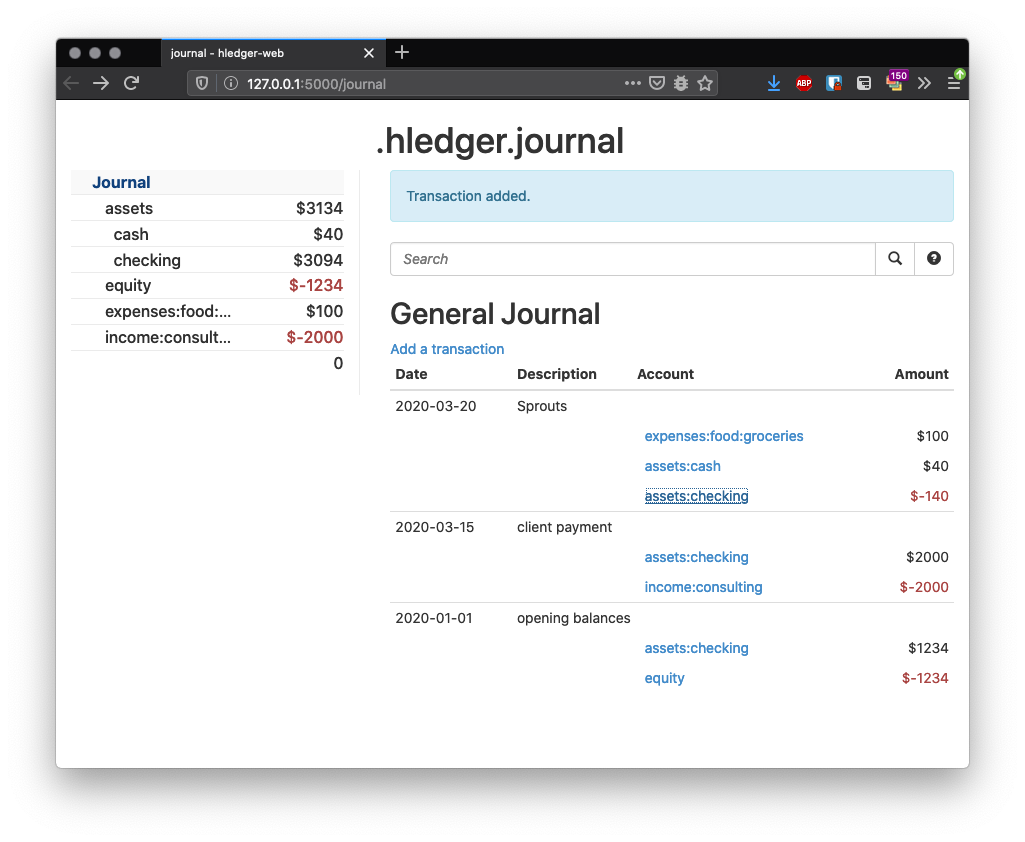
After pressing RETURN. The journal now shows three transactions, with the most recent at the top:
Now, press s to show the sidebar again.
We can see it shows the account hierarchy, and each account's balance, based on the transactions entered so far:
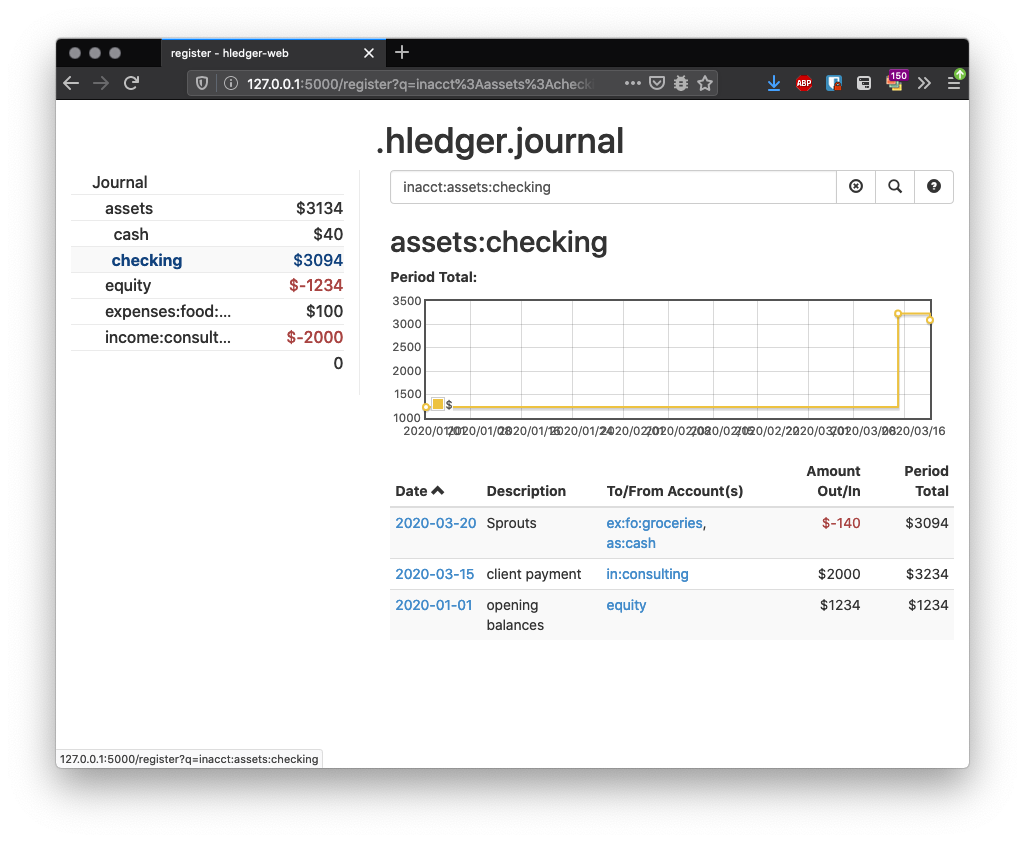
Clicking on, eg, checking shows the Register for that account -
a list of the transactions affecting this account, and their running total,
and a chart of that total over time:
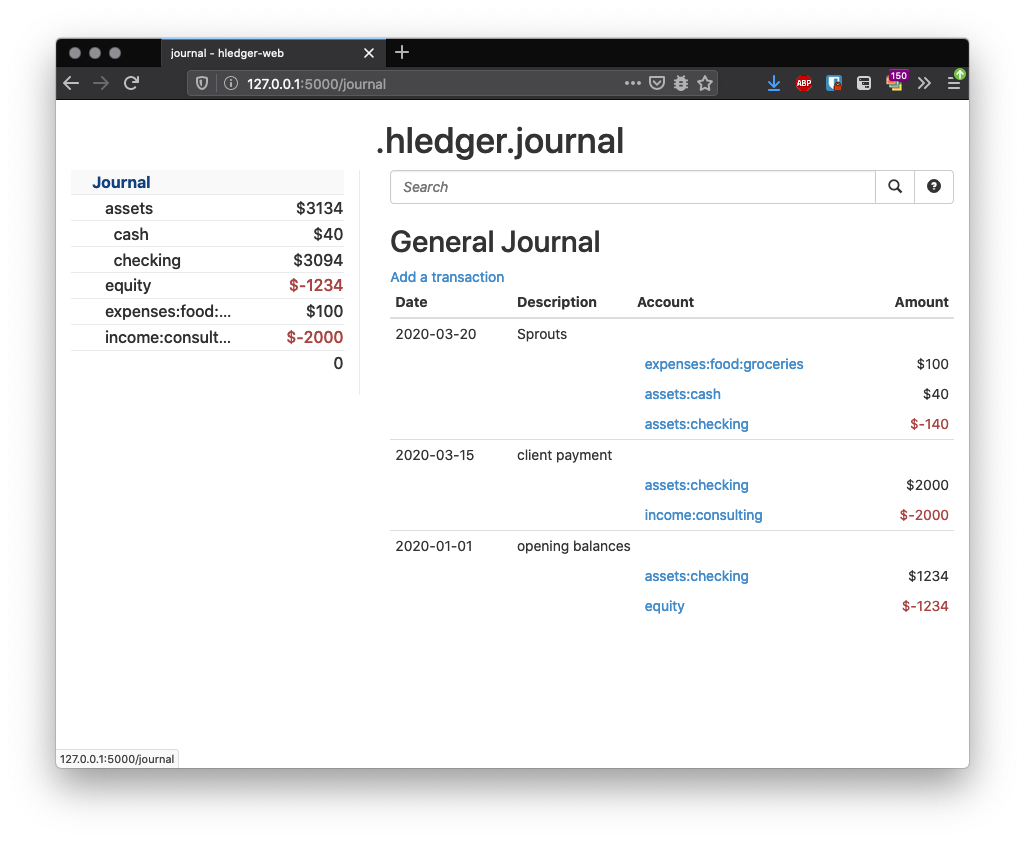
Press j, or click Journal, to return to the General Journal page showing everything:
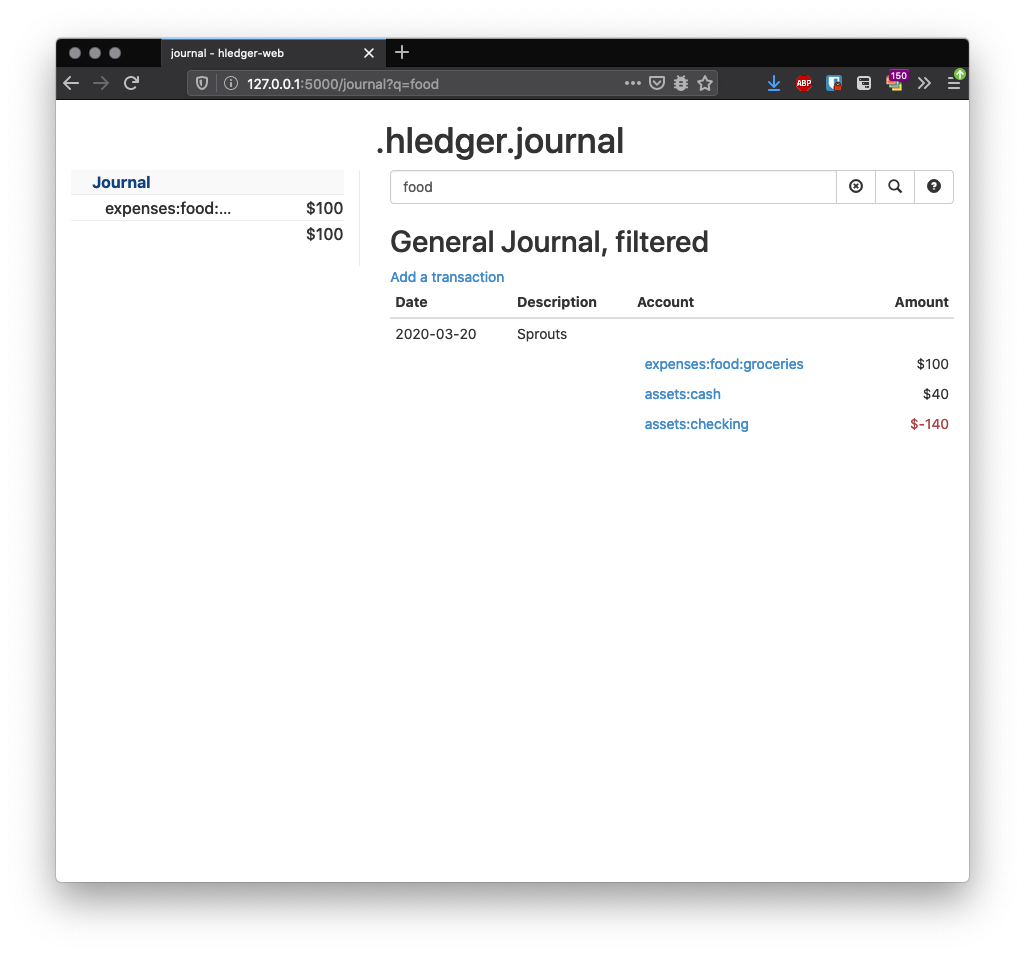
Let's try filtering these transactions with a query.
Type food in the search field and press RETURN.
Now we see just the transaction involving a food account:
Click the x button or click Journal or press j to see all data again.
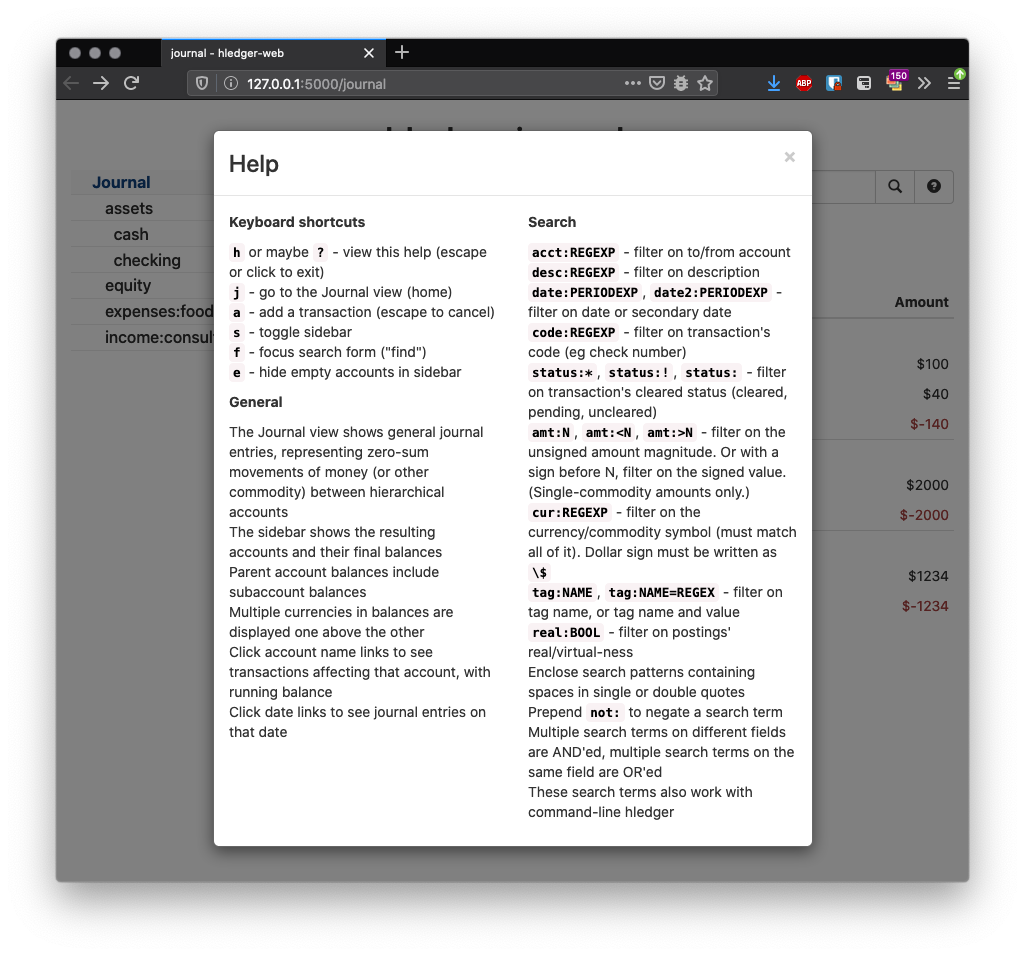
You can see quick help by pressing ?, or clicking the ? button near the search field.
More help is available in the hledger-web and other manuals, of course:
That's mostly it! Although there are basically just two screens, with hledger's full query language available (and with the general flags available on the command line), you can do a surprising amount with hledger-web. You can also change permissions to enable edit/upload/download access.
