Tutorial: hledger-ui
hledger-ui is hledger’s TUI (a full-window terminal interface). It’s fast, efficient, and a bit more featureful than the web UI.
Check your installation
Open a terminal or command prompt and check your hledger-ui version. It should be reasonably up to date. This doc was last tested with:
$ hledger-ui --version
hledger-ui 1.17.1.1
If this fails, check Installing for install and setup tips.
Start hledger-ui
Normally, you start hledger-ui by running hledger-ui in a terminal.
Any standard terminal app will do, but not a command prompt that
doesn’t allow cursor positioning (such as an emacs shell buffer).
(In that case you would see garbage output like ^[(B^[(B──────────── tmp.journal account balances...,
and you would have to press q, RETURN to exit.)
For this tutorial, we’ll specify a new temporary journal file, to suit the steps below and avoid disturbing any existing data:
$ echo > tmp.journal
$ hledger-ui -f tmp.journal
A quick tour
With an empty journal, there’s not much to see. But we can see: the
name of the journal file (tmp.journal) and the screen (account balances)
at the top:
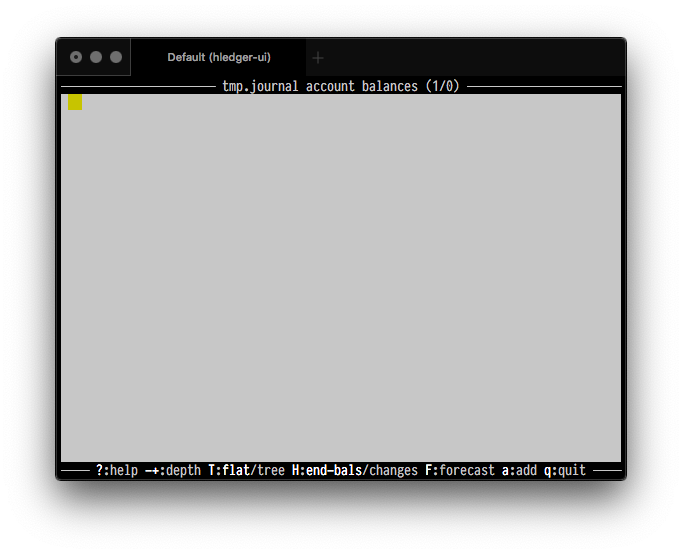
And some quick help across the bottom,
telling us that pressing q is a way to quit hledger-ui,
and pressing a is a way to add transactions.
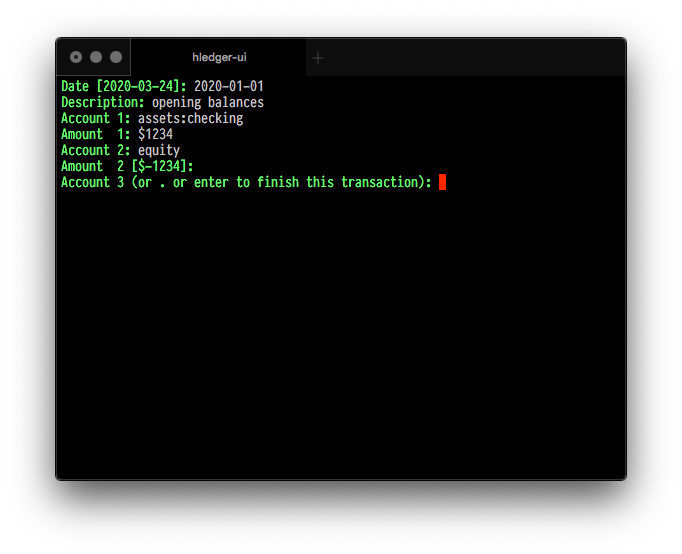
Press a:
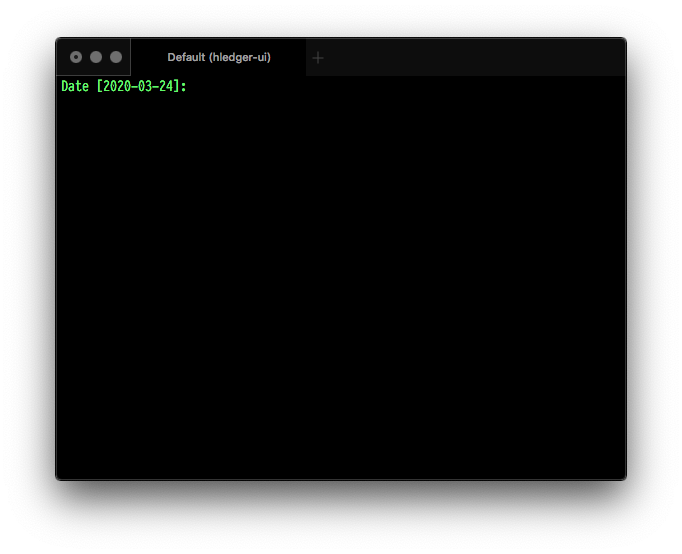
This bare-bones data entry UI is hledger’s add command, also introduced in Tutorial: hledger add.
Here, we’ll use it to enter a few transactions,
similar to the 5-minute quick start example.
After each prompt, type the value shown in white and press RETURN.
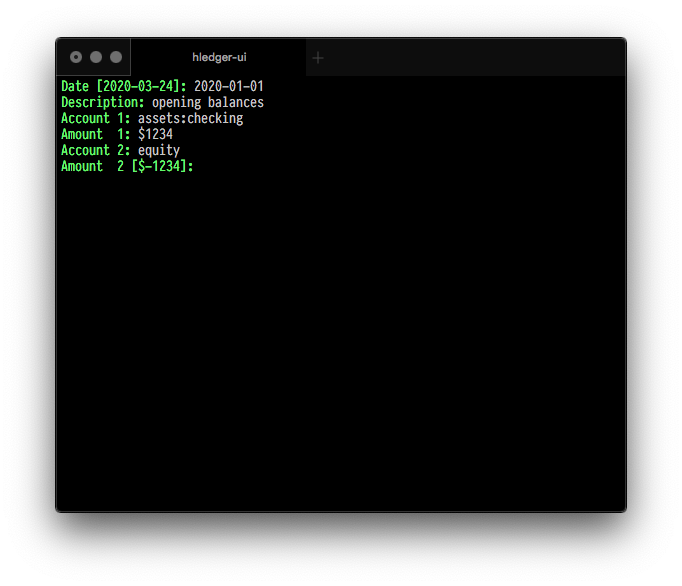
Note when we get to Amount 2, hledger guesses that this is a two-posting transaction
and as a default value offers the amount that would balance the transaction ($-1234):
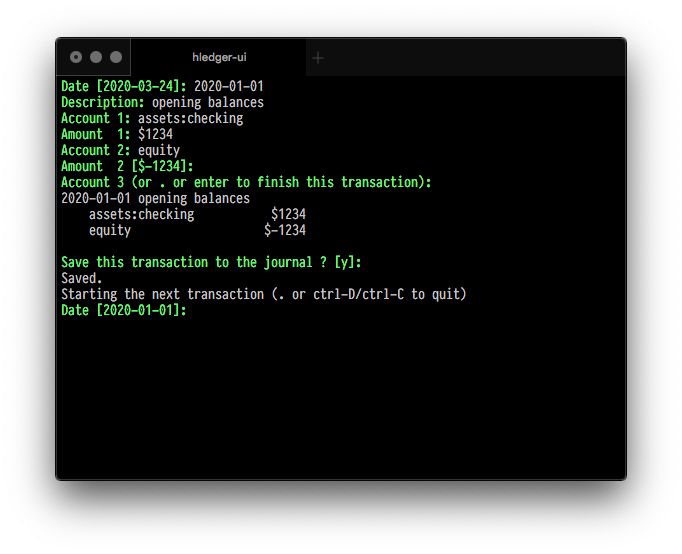
In such cases we can press TAB to enter the default value, with an opportunity to edit it before pressing RETURN:
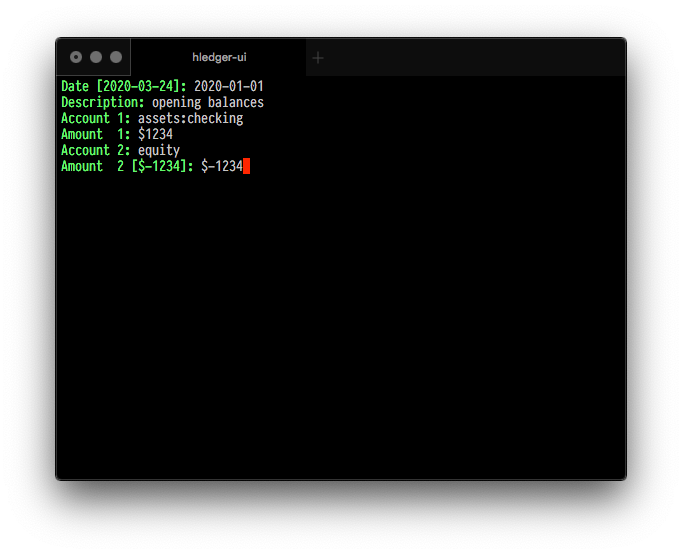
Or just press RETURN to use it.
At this point transaction is balanced, and so we have the option to end the transaction. Press RETURN (enter) to do that:
We get one more opportunity to preview the resulting journal entry.
Press RETURN again to accept the default answer (y):

When we see “Saved.”, we know the entry has been written (appended) to the journal file.
And we get another Date prompt, ready to enter another transaction:
Continue entering the values shown in white (2020-03-15, client payment..).
This time, based on the description, hledger has picked a “similar transaction”,
which will supply defaults for the following prompts. Eg assets:checking for Account 1.
That’s what we want, so press RETURN to accept it:
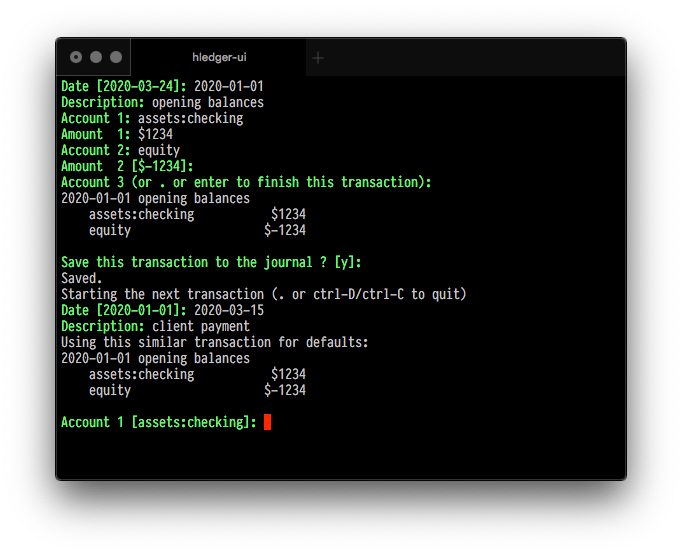
The next defaults ($1234, equity..) are not what we want,
so ignore them and continue entering the values shown ($2000, income:consulting..):

And as before, press RETURN a few times to finish and save this transaction:
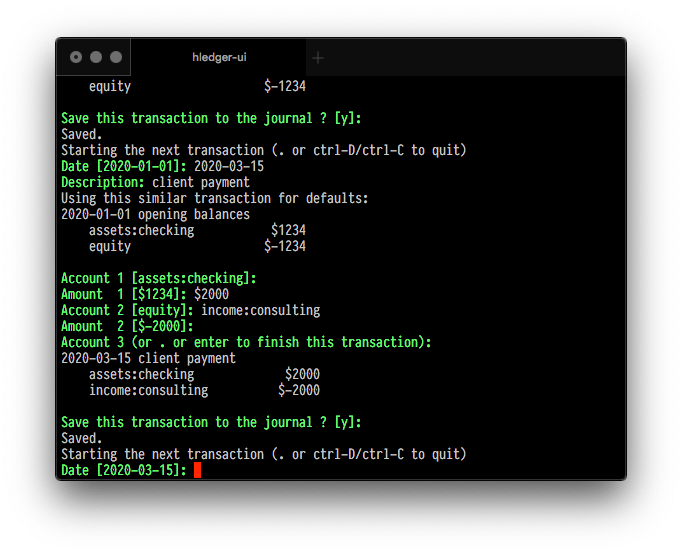
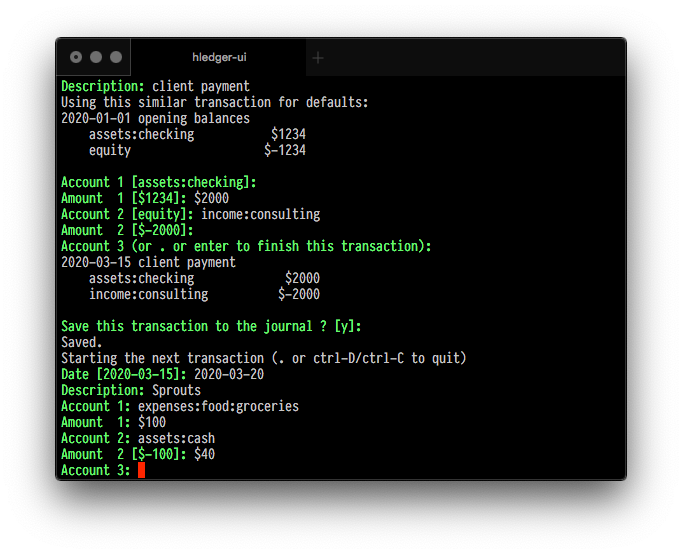
Enter the values for the final transaction (2020-03-20, Sprouts..).
Note, we don’t accept the default for Amount 2,
so the transaction remains unbalanced, and we can continue on,
to enter the third posting:
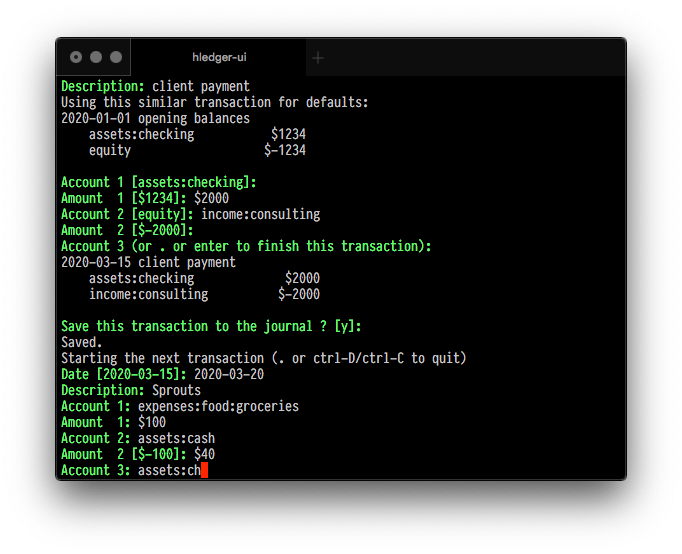
When entering a value we’ve used before, we can type just the start of
it and press TAB to auto-complete the rest, saving some work:
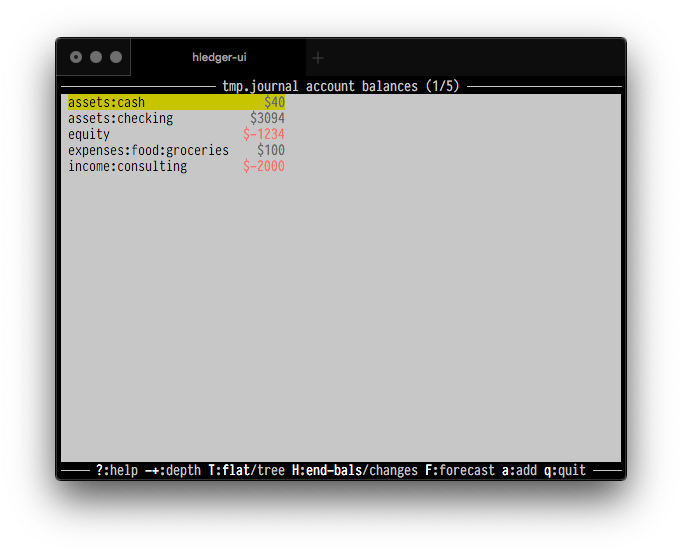
Complete this transaction, and this time at the Date prompt enter . (period) and RETURN to end data entry:

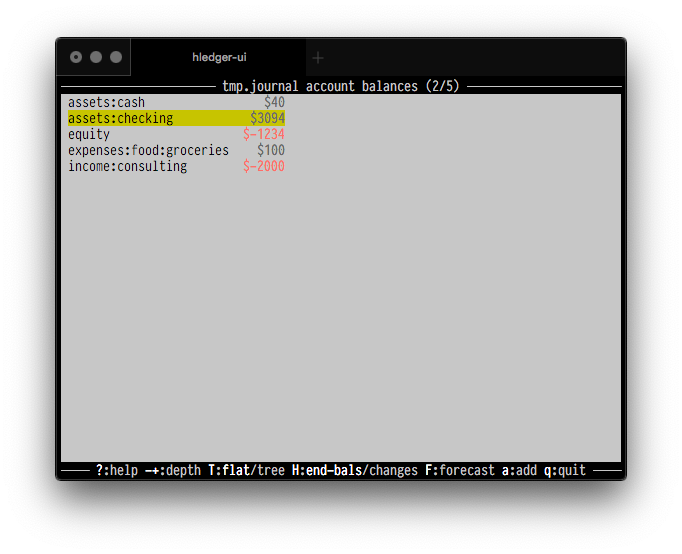
We have returned to hledger-ui, and now we see the accounts and their ending balances:
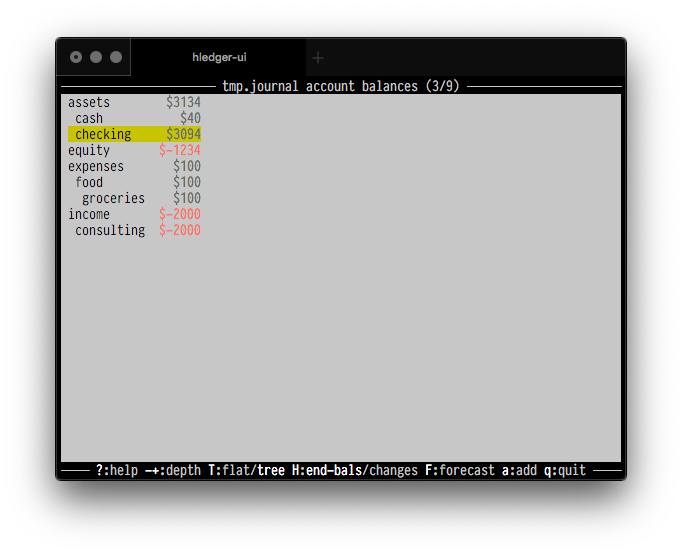
Press DOWN (down arrow) to move the selection (the yellow highlight) to the assets:checking account:

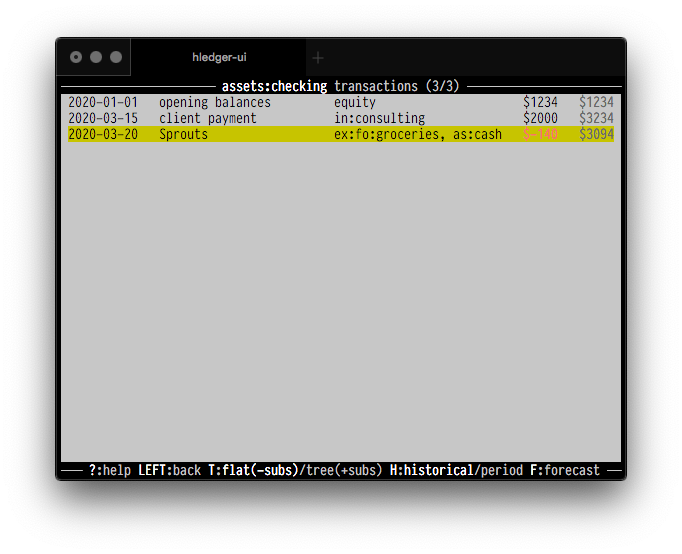
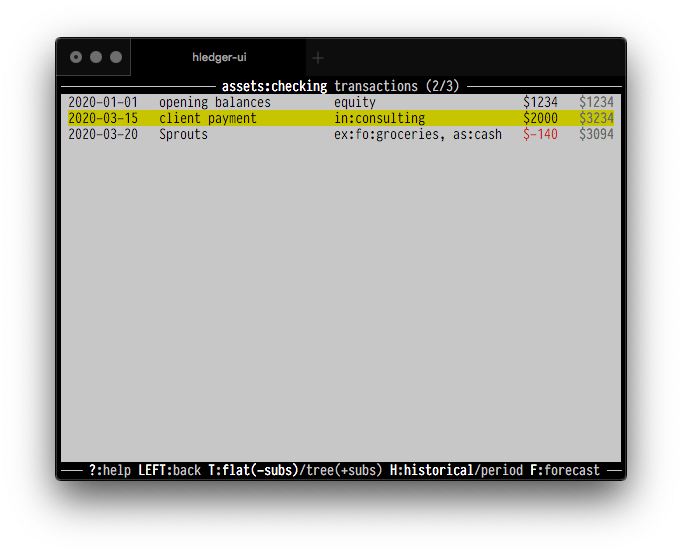
Press RIGHT to “drill in” to see the transactions in assets:checking (“register” screen).
The third column shows the other account(s) involved, abbreviated when necessary.
The last column is the account’s running balance:
Press RIGHT again to see the selected transaction’s journal entry (“transaction” screen).
We can see this is transaction number 3 in the journal, and also number 3 of 3 in the assets:checking account:

On this screen we can use the up and down arrows to step back and forth through transactions.
Press UP. Now we’re at transaction number 2:

Press LEFT to go back to the previous screen (assets:checking’s register):
And LEFT again to go back to the top screen (accounts):
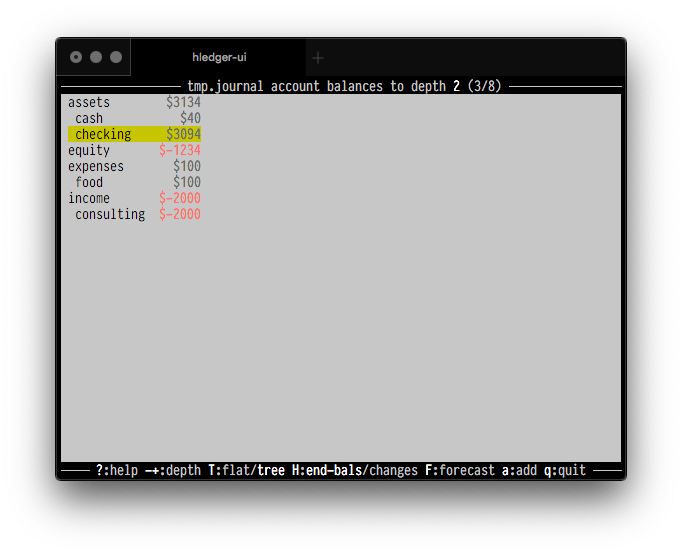
Press T (capital T) to switch from “flat mode” to “tree mode”. This shows the account hierarchy more clearly:

With a lot of accounts, sometimes you want to see less detail.
Press the - (minus) key once to reduce the account depth limit by 1.
Now the expenses:food:groceries subaccount (depth 3) has been hidden,
and the heading says “to depth 2”:
Press the - key once more, reducing the depth limit to 1:
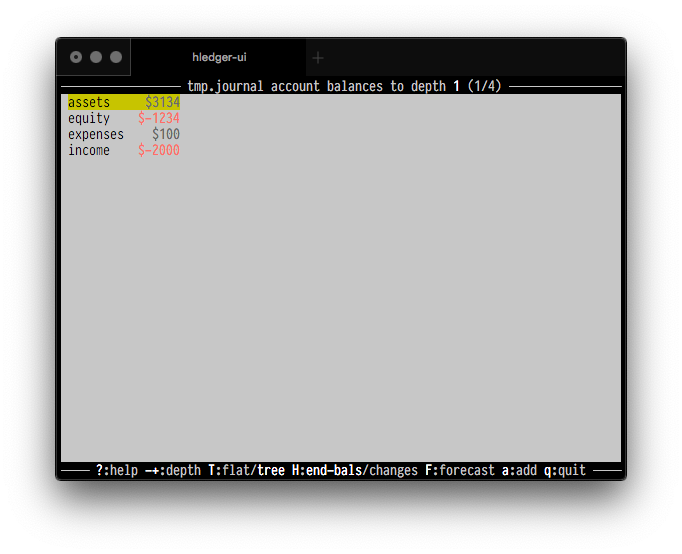
We could press + to increase the depth again, or a number key to set it directly.
Press 9 to make it “unlimited”, removing the depth limit:
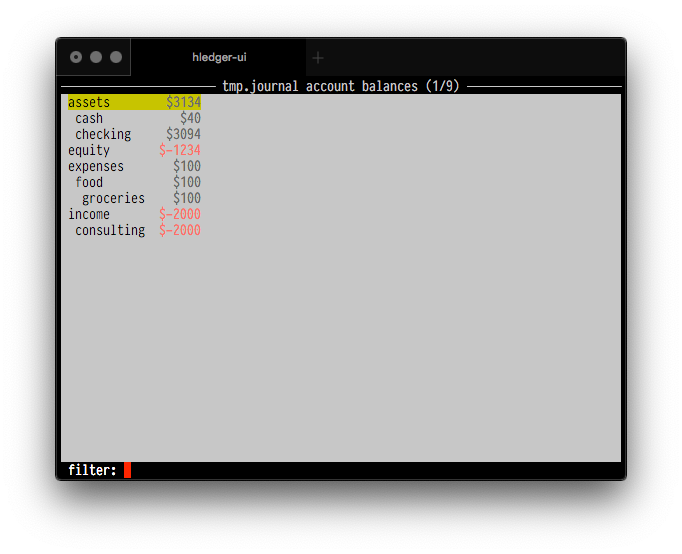
Press the / (forward slash) key to enter a filter query.
A filter: prompt appears at the bottom:
Let’s filter for accounts with “checking” in their name. Type checking and press RETURN:
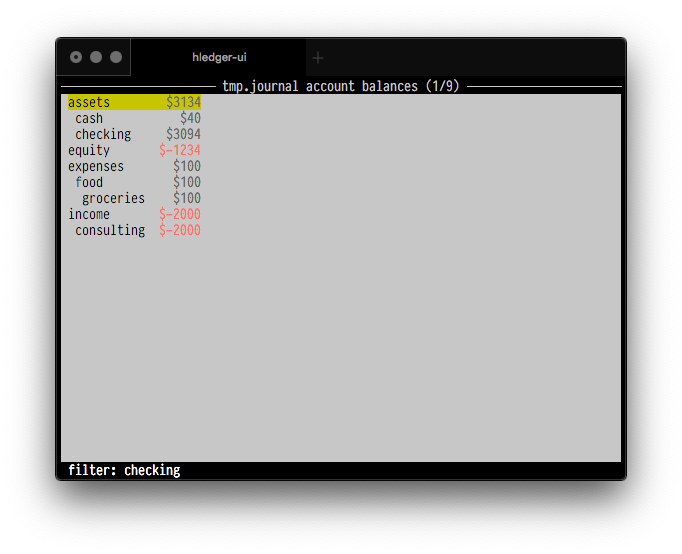
Now only assets:checking is shown.
(And its parent assets account, because we’re in tree mode):

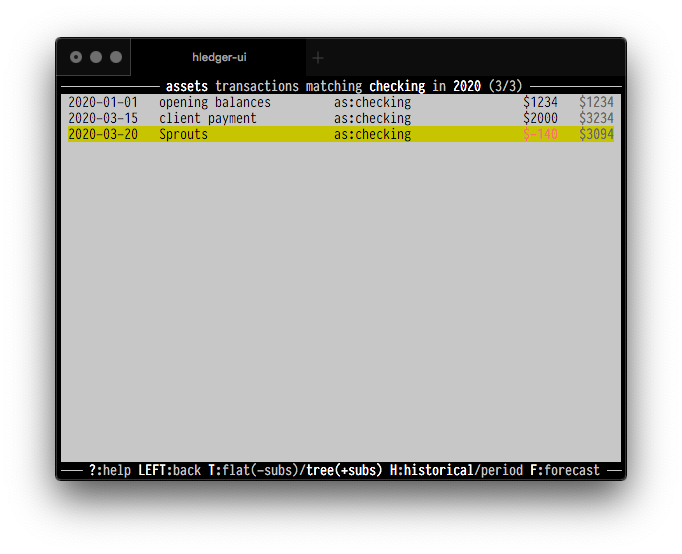
Press RIGHT to see the register for the assets account.
Note, while there are no transactions directly referencing the assets account,
the transactions of its subaccount assets:checking are shown, because we’re in tree mode.
(In flat mode, they wouldn’t be.
That’s what the T:flat(-subs)/tree(+subs) in the help line is about.):

On a register screen, the SHIFT-DOWN/SHIFT-UP keys shrink/expand the time period being shown.
By default, the register shows all of the account’s transactions.
Hold down SHIFT and press the DOWN arrow once. Not much has changed,
but now the heading says “in 2020”
(at least, if you are doing this in the year 2020..).
The report period has shrunk to “the current year”:
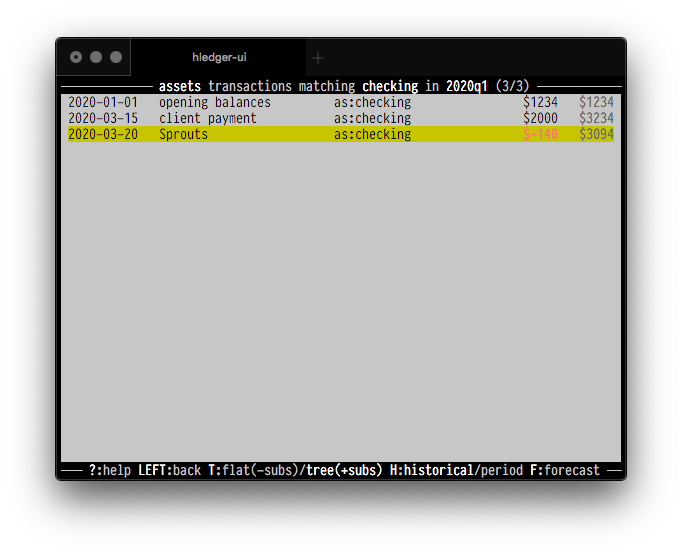
Press SHIFT-DOWN again. Now it says “in 2020q1”
(at least, if you are doing this in the first quarter of 2020..).
The report period has shrunk to “the current quarter of the current year”:
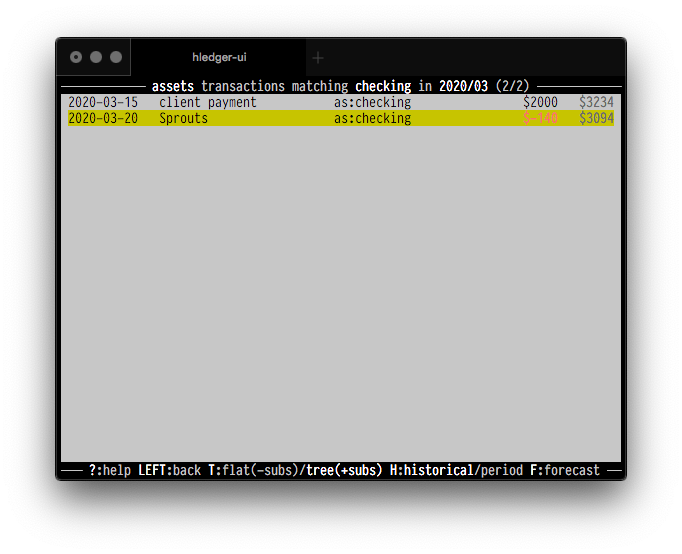
Press SHIFT-DOWN again. The next smaller period is “the current month”,
and (at least, if you are doing this in March, 2020..)
the heading now says 2020/03, and now we can see that only 2
of the transactions are in March:
When the report period has been shrunk in this way,
the SHIFT-LEFT/SHIFT-RIGHT keys move backward/forward in time.
So pressing SHIFT-LEFT now should take you to the previous month (2020-02).
There are no transactions in this month.
(ignore the columns of dots; it’s a display bug):

Press SHIFT-LEFT once more to show the previous month (2020-01),
where we can see the single January transaction:

To expand the report period again, press SHIFT-UP several times,
until the “in ...” suffix disappears from the heading:

Press the ESC (escape) key - this is another way to return to the top screen,
and also clears any filter query.

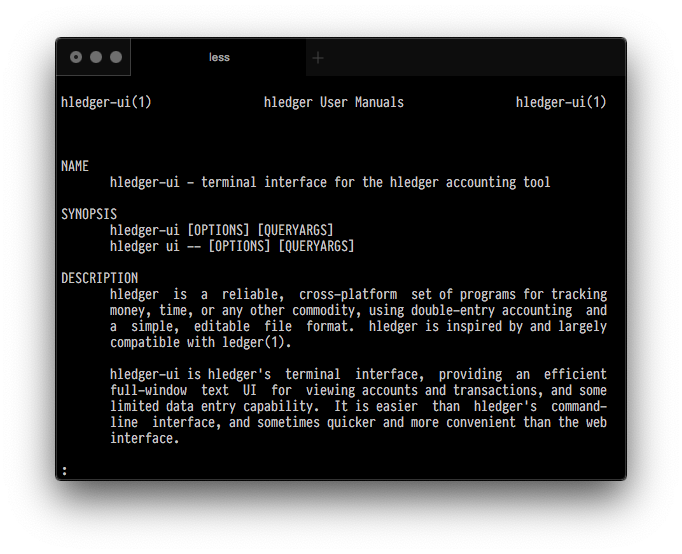
Pressing the ? key shows a more detailed help dialog.
To close it, press ? again, or ESC.

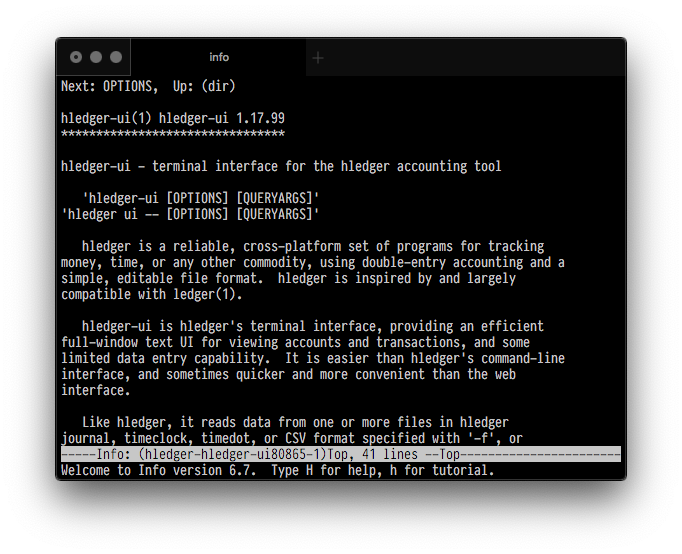
While the help dialog is open, you can press p, m or i
to see the hledger-ui user manual in several offline formats
(useful if you can’t access the web version).
The formats are: plain text (p), using your $PAGER for scrolling if possible:
Unix man (m):
or GNU info (i):
Press q to return to hledger-ui.